Photoshop效果教程:仙境景色(4)
來源:
作者:
學習:6258人次
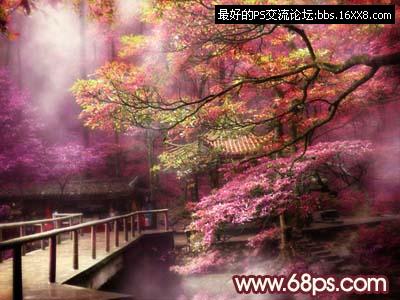
7、新建一個圖層,按Ctrl + Alt + ~調(diào)出高光選區(qū),填充顏色:#FEFCEA,把圖層混合模式改為“正片疊底”,然后加上圖層蒙版把一些模糊的地方用黑色畫筆擦掉,效果如圖12。
<圖11>
<圖12>
學習 · 提示
- 發(fā)評論 | 交作業(yè) -
最新評論
![](http://www.theoat.com.cn/1diy/imges/noavatar.gif)
spssquare2015-03-25 11:13
第一次來交作業(yè)<吃驚>![PS的仙境副本.jpg](http://bbs.16xx8.com/data/attachment/forum/day_081115/20081115_b7c26e0bfeda65c606bc4cd3wcLGB0hf.jpg)
![PS的仙境副本.jpg](http://bbs.16xx8.com/data/attachment/forum/day_081115/20081115_b7c26e0bfeda65c606bc4cd3wcLGB0hf.jpg)
回復
![](http://www.theoat.com.cn/1diy/imges/noavatar.gif)
丅絘2015-03-25 11:12
我也做了但是差好遠是一整片紅怎么擦掉多余的云彩 底3步的曲線調(diào)整值具體是多少最后是用什么銳化的我做了一張做的不好 但是還是發(fā)上來給樓住看看![無標題.jpg](http://bbs.16xx8.com/data/attachment/forum/day_080805/20080805_af19f176619219f8ec4bxb8HlJOufXYm.jpg)
![無標題.jpg](http://bbs.16xx8.com/data/attachment/forum/day_080805/20080805_af19f176619219f8ec4bxb8HlJOufXYm.jpg)
![](http://www.theoat.com.cn/1diy/imges/noavatar.gif)
飛天聽語2008-08-04 10:45
2、創(chuàng)建色相/飽和度調(diào)整圖層,參數(shù)設置如圖2,確定后把圖層混合模式改為“色相”,效果如圖3。這一步比較重要調(diào)色相/飽和度的時候照片的顏色會嚴重失真,這個沒有關系,只要改變圖層混合模式就可以! 為什么我的調(diào)了不變顏色啊?第一步我搞好了但第二步我總是搞不來.請教一下 謝謝 Ctrl+u是調(diào)色相/飽和度的
![](http://www.theoat.com.cn/1diy/imges/noavatar.gif)
相關教程